How to replace the gas hob with induction hob?

The gas hob is used by most people to cook the delicious meals of their culinary tradition, but the technology of induction hobs is increasingly growing. A revolutionary way of cooking! Unfortunately, though, the replacement of the hob presents a struggle to many, mainly because often, induction hobs have slightly different sizes from gas hobs. That happened to me too. What can you do in such cases? I will show you step-by-step how to replace the gas hob with induction hob.
You need to be equipped with appropriate tools and the will to try your best in a rewarding work! First, proceed to make a cut on the kitchen counter. This operation is necessary because you must enlarge the space reserved for the old gas hob, in order place the new, bigger induction hob. Usually for a 60 cm wide hob, you need to make the cut 1 centimetre wider. It looks like a difficult job, but it is not really. In this article I want to document with pictures the work that I did and the end result of it.
Step one: the removal of the old gas hob
Let’s start our work, I will show you how to replace the gas hob with induction hob.
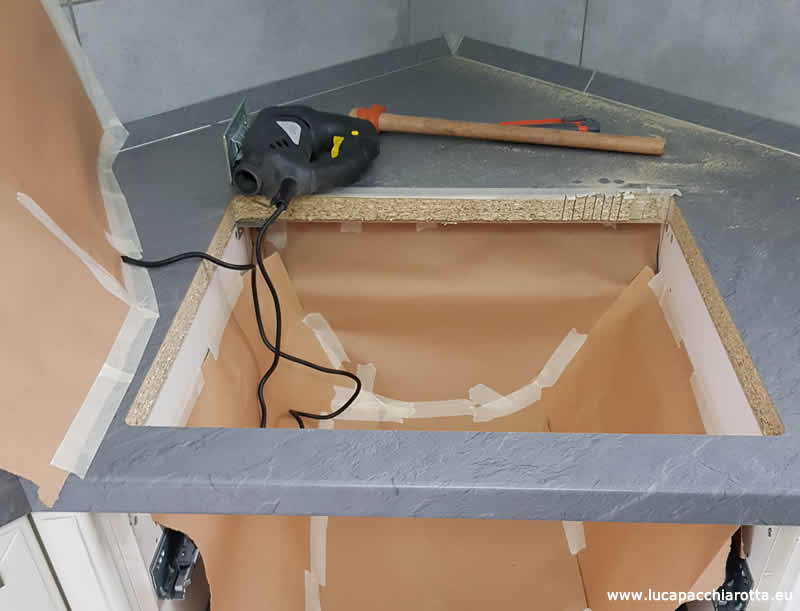
Before proceeding with the removal of the old gas hob, it is necessary to remove any drawers below the hob. The removal operation might slightly change, depending on the model of the hob, but the process is similar. Usually, it is enough to unscrew the 4 screws of the supporting parts that keep the hob and the kitchen top together (they prevent the hob from moving upwards). Once the screws and the supporting parts are removed, you must proceed to remove the hob by slowly raising it and then getting rid of any silicone that might be stuck on the kitchen top. When you are done with this operation, the situation will be similar to this:

Step two: preparing the cut for the induction hob
The biggest inconvenience you might encounter during this process, is the dust created from the cuts, that can easily spread around. This problem can be minimized by taking preventive measures:
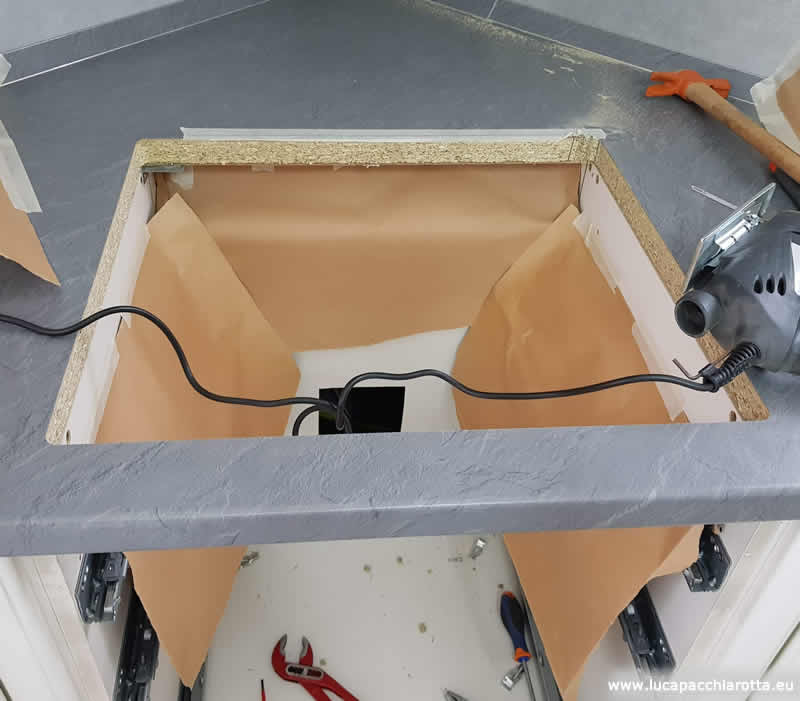
- Cover the part under the top with wrapping paper or plastic sheet; particularly protecting the drawer slides.
- If not possible to adequately cover the area around the hob, it will be necessary to cover furniture, tables, chairs, and everything nearby, with plastic sheet. This is to make sure that the dust will not get inside the furniture and will not stick to the surfaces.
To limit the debris that would have spread around during the cut, I made sure to close the hole of the hob with wrapping paper, so the dust and wood pieces remained inside the paper. Here is what I did:
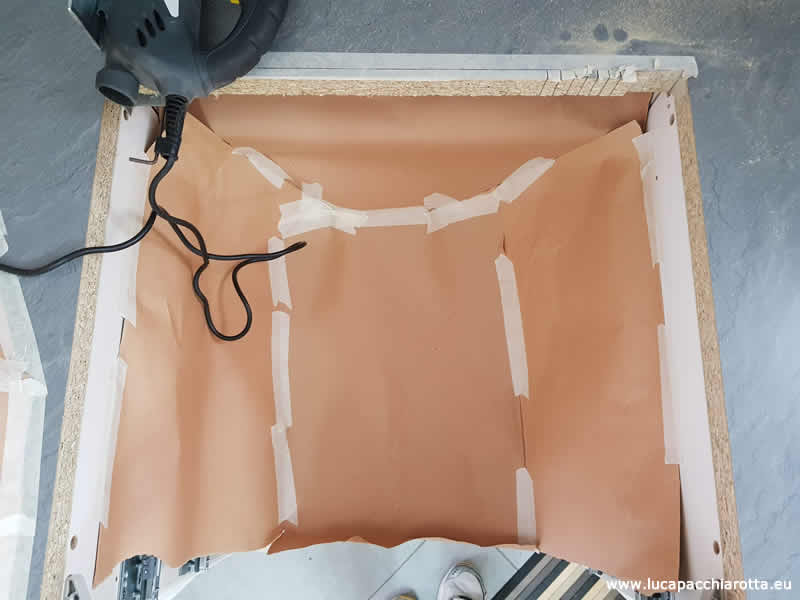
We are now ready to move on to the last phase…
Step three: the accurate cutting of the kitchen top
At this point we must decide whether to remove the excessive centimetre from the anterior or posterior part of the hole. I decided to do it in the posterior part, so any possible imperfections of the cut, would not be visible.
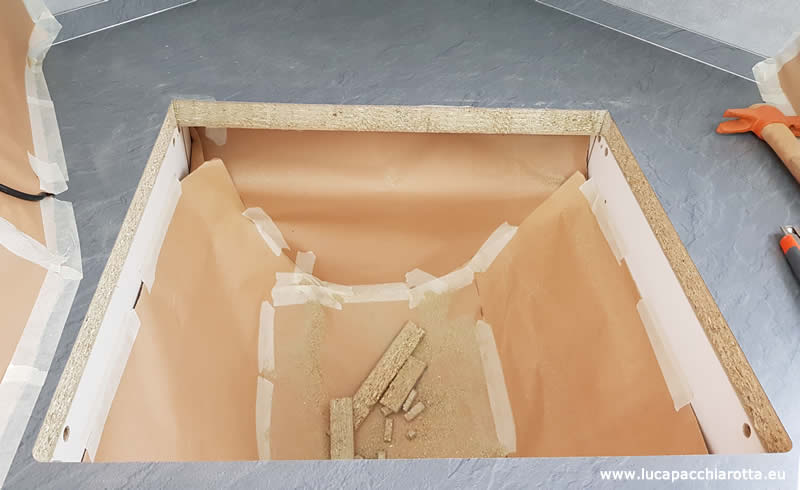
To start the cut, I used this technique:
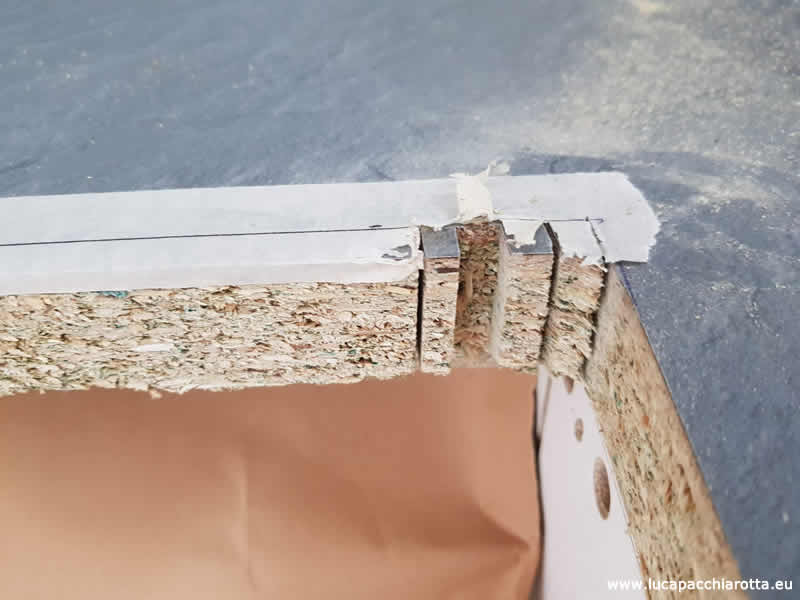
After drawing a line that delimits the part that needs to be cut, I made small deep cuts, from the surface, towards the bottom of the kitchen top. In this way we can create an entry point for the jigsaw. Once these “slices” are made, they can be removed with a flat screwdriver and a hammer; by carefully tapping the wood pieces (there is no need to use a lot of force), until they slowly “slide away”.
You may be wondering why I used a paper tape…Well, the answer is simple: in some places, because of the silicone previously used for the gas hob, the marker could not write. By putting paper tape, I could easily draw the cut line, and the problem was solved!
Here we are! Let the cutting begin!
At this point, everything is ready for the final cut. Since we already created a space for the jigsaw to enter comfortably, just place the blade and start cutting. You can also make a few deep cuts along the line (from the surface, towards the end of the top). This is to interrupt the long cut, and instead divide it into smaller cuts. When you are done with all the cutting, here is what the kitchen top will look like:

In the foreground you can see my jigsaw, which I purchased specifically to complete this job, because the first one stopped working just after I started cutting. To be fair, my kitchen counter is made out of a considerably durable material, and it is necessary to have a good jigsaw to cut into it.
Well, at this point we all are curious to know the end result of all this work. Here is a picture of it:
The new jigsaw with a good blade, made a very clean cut, without ruining or even scratching the kitchen counter. Once I placed the new induction hob into the hole, the job was all done! What is left to do now, is remove the protection wraps and a start a nice cleaning of the “work site”… 🙂
My final thoughts on replacing a gas hob with induction hob
I have to say that I do not understand why these induction hobs do not have standard measures, and so forcing us to do this type of work. Maybe there will be some technology related limitations, I do not really know for sure, but this remains a very widespread problem.
Fortunately, the operation of replacing in itself is not hard to do, for as long as you have all the right equipment and a little patience. You need a good jigsaw, a hammer, and a flat screwdriver with a tip not too wide.
An aspect that I had underestimated a bit, was the dust generated by the cut. Do not think that covering the furniture as well as you can, is a waste of time; it is precious time that you can save in the final phase of your work.
I hope I have shown you clearly how to replace a gas hob with an induction hob and I hope I have been of help and inspired you to do a nice DIY job, like this one!